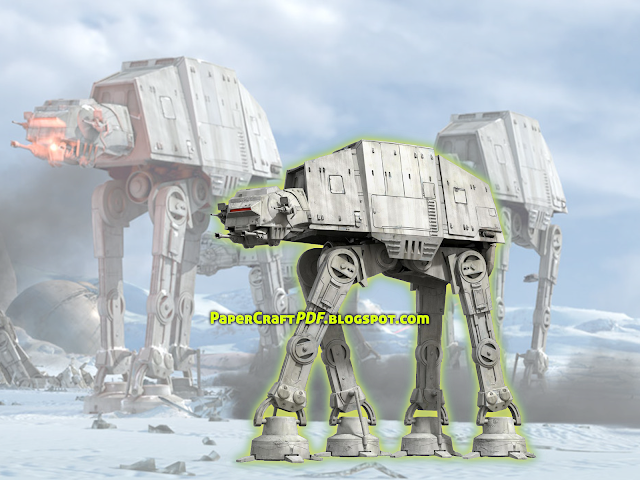
This paper craft model is for the Star Wars Movable All Terrain Armored Transport AT-AT Combat Walker paper model template. This Combat Transport Walker based on the Star Wars series. To give due credit, this papercraft model template is designed by Petr Fischer. And this BG-011B Build Burning Gundam papercraft model template is available on both PDF versions only with a few download links to choose from below.
I must emphasize that the resulting model of this AT-AT Walker papercraft model template is movable - yes, this is movable.
I must emphasize that the resulting model of this AT-AT Walker papercraft model template is movable - yes, this is movable.
 |
| All Terrain Armored Transport Movable AT-AT Combat Walker Papercraft Model Template (Star Wars) |
The All Terrain Armored Transport (AT-AT) Combat Walker was a four-legged combat walker used by the ground forces of the Galactic Empire. With the Imperial-class Star Destroyer and the TIE/ln space superiority starfighter, it was one of the most famous symbols of the Empire's military might.
Download All Terrain Armored Transport AT-AT Combat Walker (Star Wars) Papercraft Model Template
♥
Download Link to PDF version of the Paper Craft Template
♥
Download Link to PDF version of the Paper Craft Template
♥
Enjoy!
💁
Some info about the Star Wars AT-AT Walker :
The All Terrain Armored Transport was an imposing, heavily armoured, quadrupedal combat walker that stood 22.5 meters tall. Due to their impressive appearance, it was used as much for psychological effect as for tactical reasons. Additionally, it also served as transports for combat personnel. The vehicle's cockpit and sensor array were located in the "head" part of the walker, which also carried spot lights and the main armaments: dual medium blasters located on the "temples," and a pair of heavier laser cannons fitted on the "chin." Inside the cockpit stood an AT-AT commander behind two AT-AT pilots who controlled the walker's movement. AT-AT pilots and personnel wore specialized suits in case the walker's pressurized cockpit was smashed open in hostile environments. The armor plating of the AT-AT was impervious to blaster bolts but not heavy weapons like proton torpedoes, as early models of the AT-AT could tank 4 proton torpedoes and an AT-TEs mass driver cannon produced no visible damage to the walkers head and body, although the legs on the early models could be damaged by missile launchers forcing it into a limp and could not withstand 4 proton bombs. However, the neck and joints proved weak spots and could be damaged by blaster cannons and other heavy weaponry. The entire walker was vulnerable to other AT-AT fire, if one happened to be hijacked and turned against the other.
Connecting the "head" to the "body" was what was dubbed the "tunnel," which would lead to a troop compartment capable of ferrying numerous soldiers, along with a vehicle bay at the walker's rear that held five 74-Z speeder bikes. The main, rectangular troop hatch was located in the middle of the walker's side, two smaller escape hatches were located both to the main hatch's immediate left and right, and the auxiliary hatch was located in the walker's underside. The walker's tail end consisted of filtered atmosphere intakes on its upper part, while a blaster cannon energizer was located within. At the bottom of the behemoth was the walker's fuel slug tank, which had a reputation of being dangerous. The walker's four legs were aided with the assistance of ankle drive motors, while inside the giant footpads were several terrain scanners.
There was a more heavily-armored variant with a darker color scheme called an Elite AT-AT. There was also a slicker variant with more slanted sides and a smaller "head" called the AT-ACT. At least four of these walkers were present during the Battle of Scarif.
Info source : starwars.wikia.com
You may see the list of papercraft templates that we have here in this blog by clicking here : ► PAPERCRAFT LIST. If there are any paper craft model templates that you want but cannot find here, just comment your request below or go to our Request Page.
Thank you.
EmoticonEmoticon